GammaCrop v1.7: Solving UV Ink Overspray on Ceramic Magnets
If you print on pre-cut substrates like ceramic magnets, you've likely encountered the annoying problem of ink bleeding or fuzzy edges. In GammaCrop v1.7, we've introduced an automated Safety Margin to elegantly solve tolerance stacking.
The Annoyance: Ink Overspray
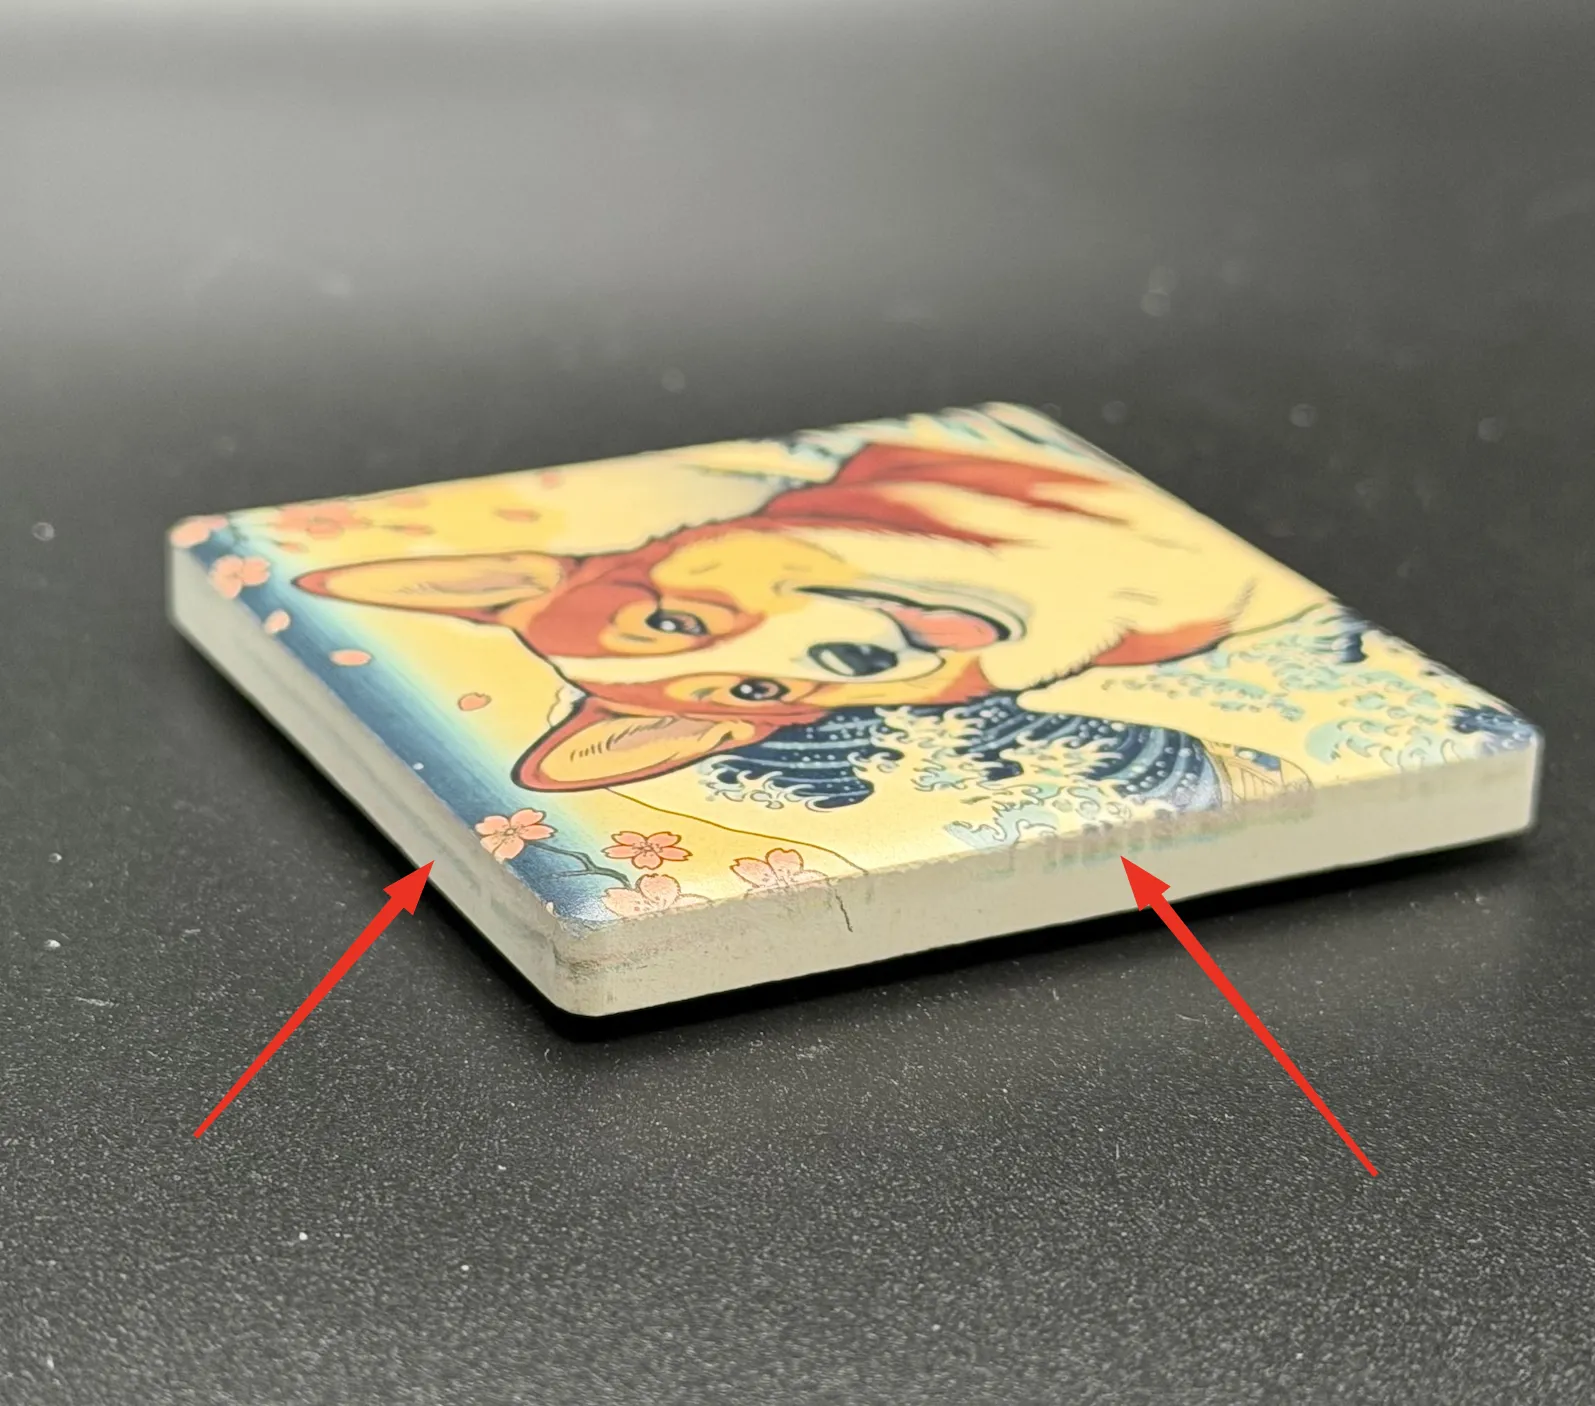
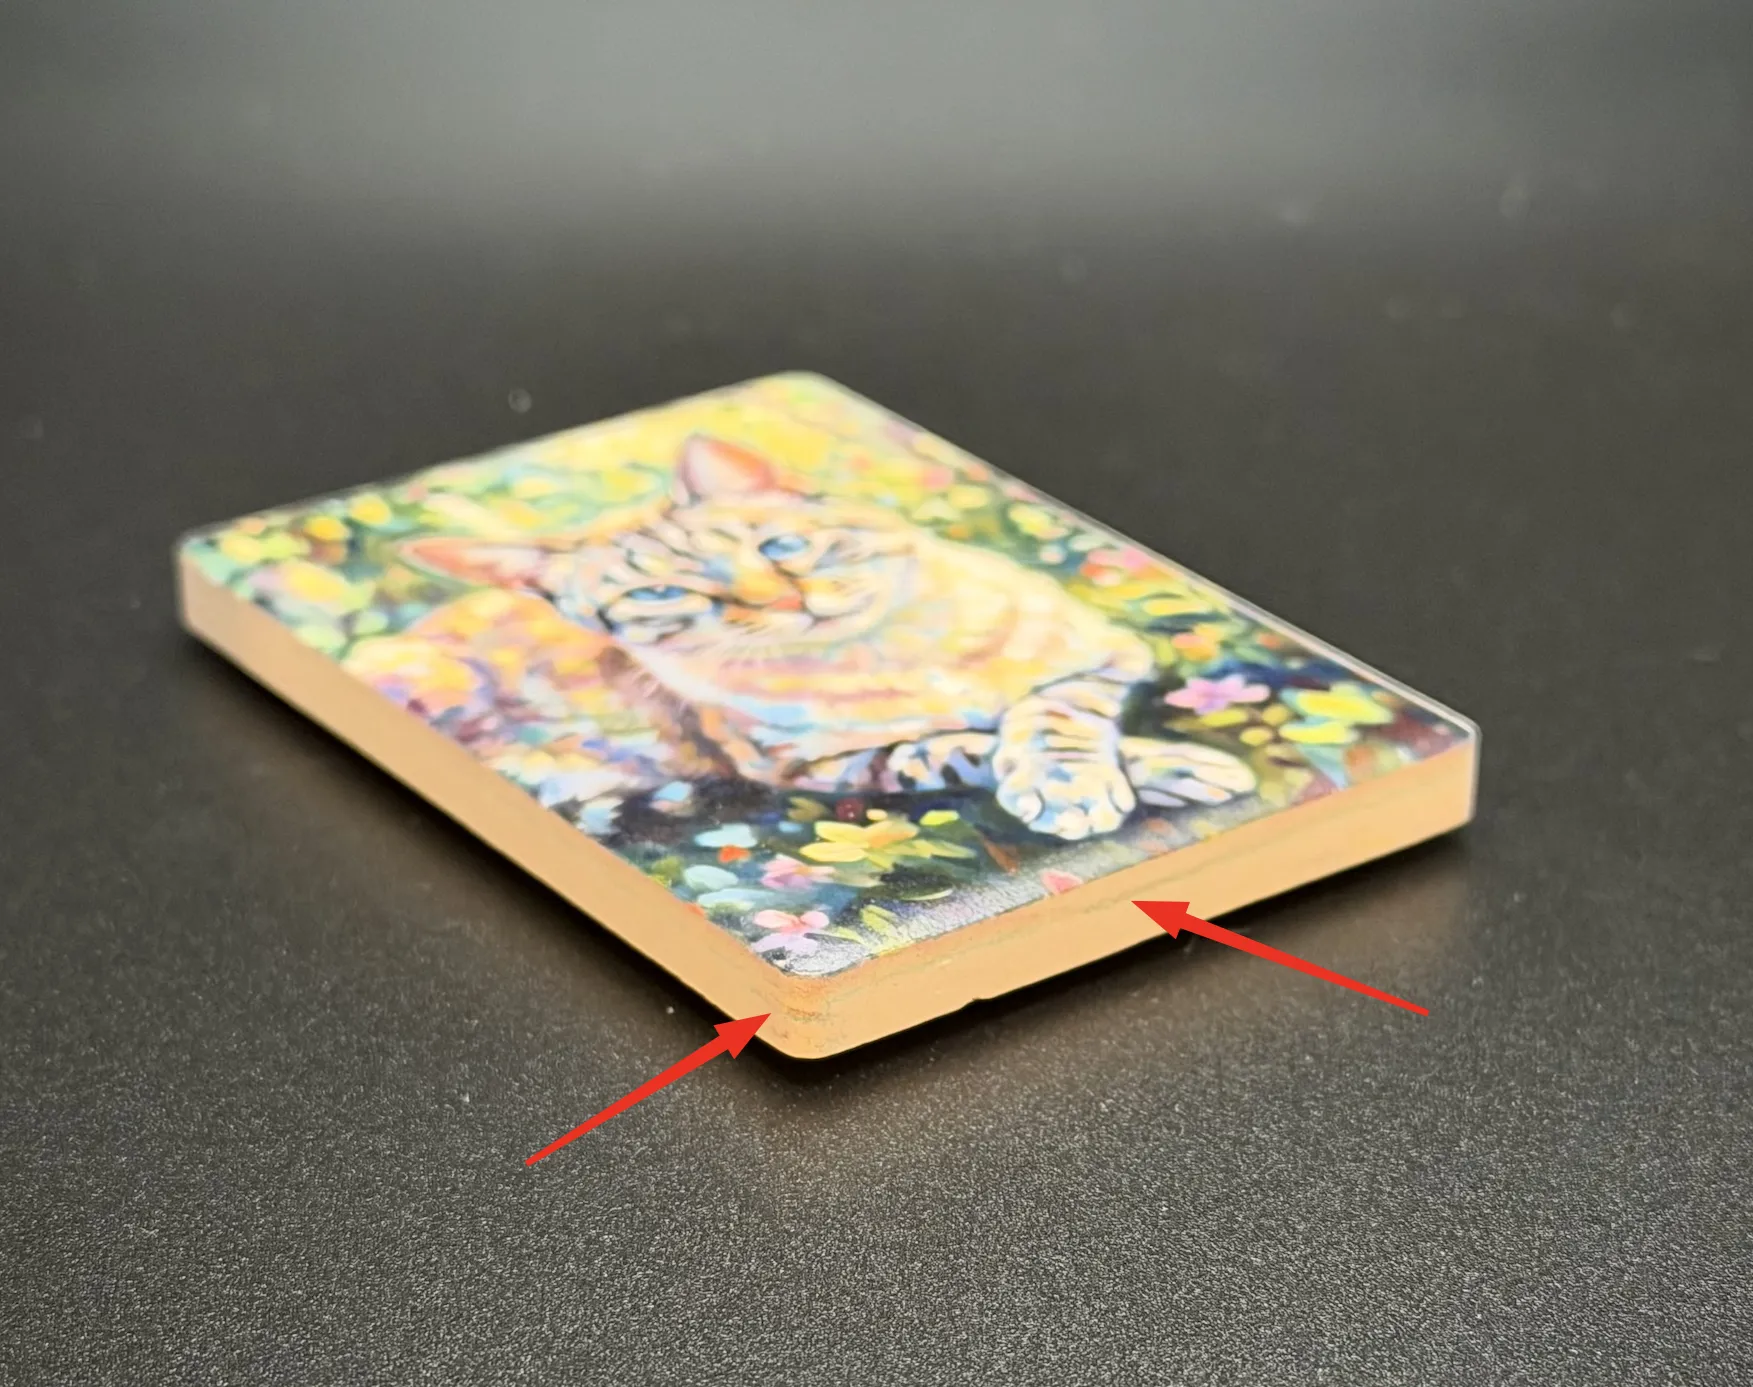
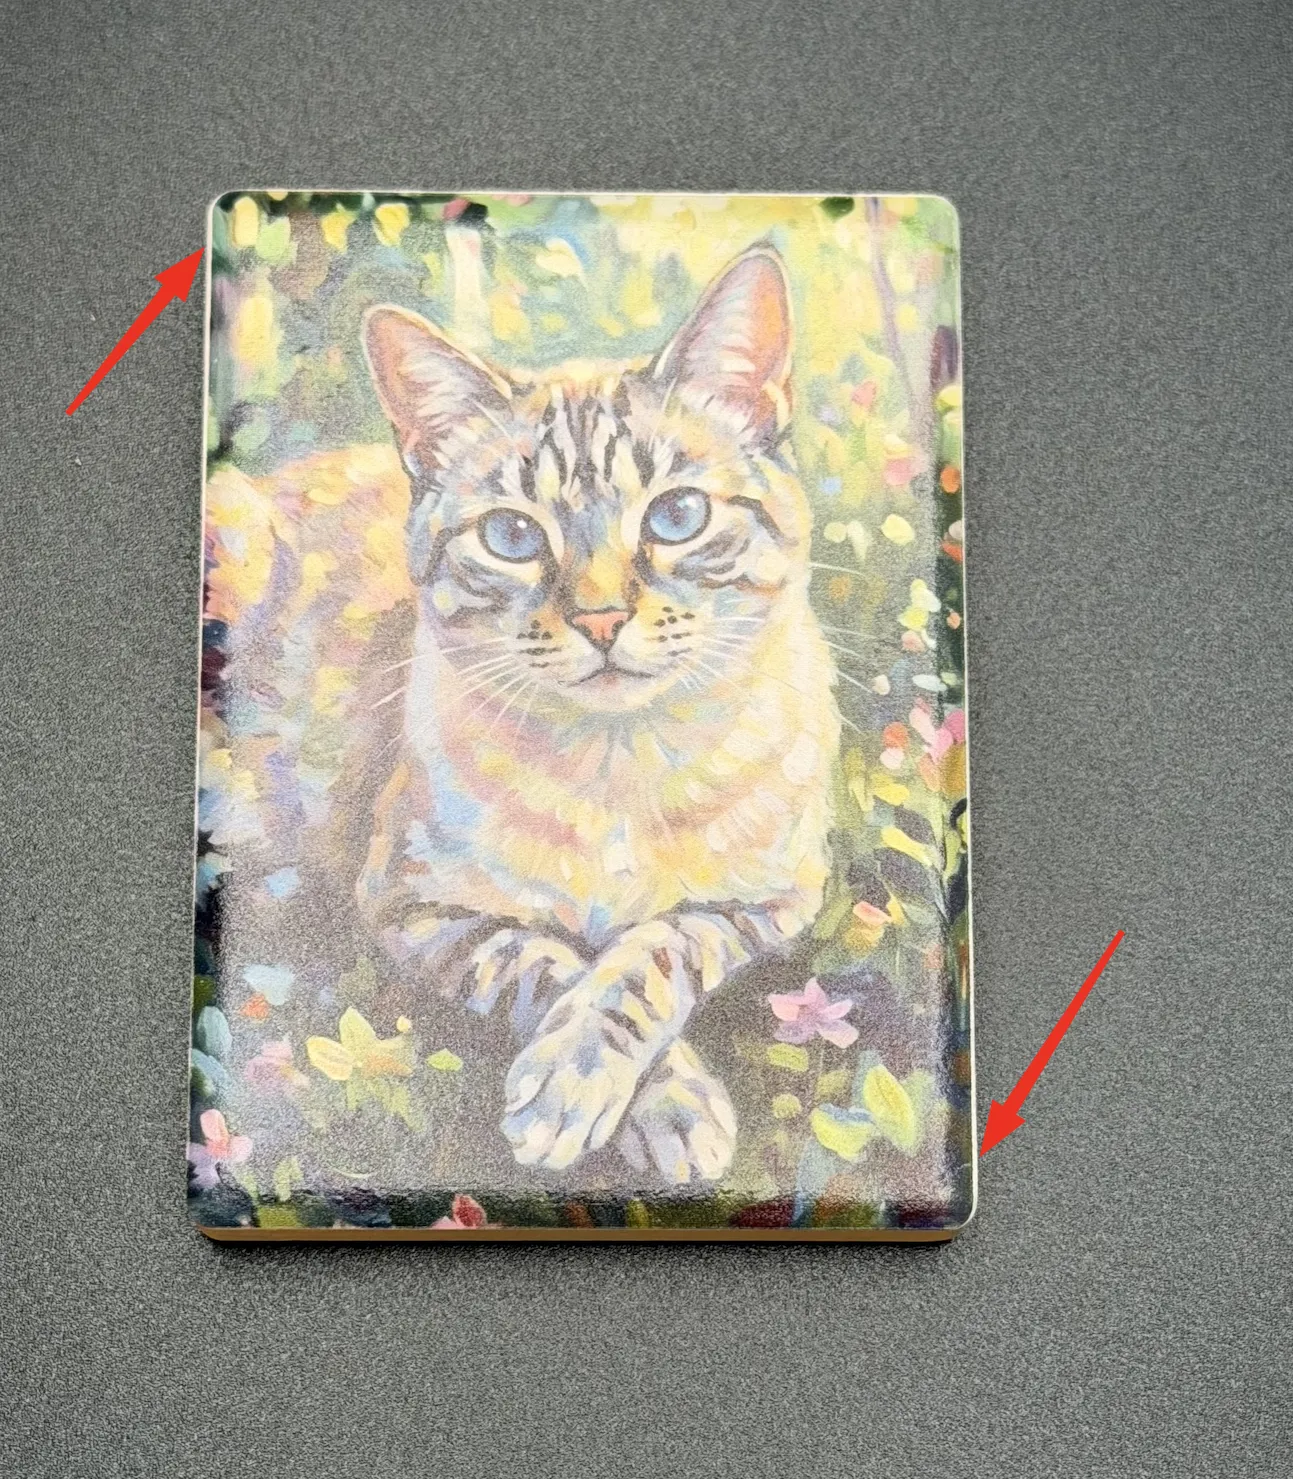
Even with a dedicated, high-precision alignment jig holding your ceramic magnets perfectly in place on the EufyMake E1 flatbed, you might occasionally notice that the print doesn't end perfectly at the edge. Instead, ink lands just past the magnet surface, resulting in messy, colored edges—especially noticeable on designs with dark or solid borders.
You might recalibrate your printer, reseat your jig, or adjust your placement, but the issue inevitably returns. Why?
Understanding "Tolerance Stacking"
It comes down to an engineering concept known as Tolerance Stacking. No physical process is perfect, and tiny variances accumulate:
- Manufacturing Tolerance: The ceramic magnets themselves vary slightly in size from batch to batch.
- Jig Precision: The jig has its own 3D-printed or machined tolerances, and placing it perfectly square on the print bed introduces human deviation.
- User Placement: Even with a perfect jig, there is a tiny bit of variance depending on how snugly you drop the magnet into the slot.
- Mechanical Repeatability (Print Drift): Entry-level and mid-range UV printers rely on stepper motors and belts. There is an inherent micro-variance (often ±0.05mm to ±0.1mm) in where the print head actually begins firing between jobs.
Add all these micro-offsets together, and sometimes the software's exact bounding box lands just past the physical magnet.
Methodology: Bleed vs. Safe Area
In the traditional printing industry (like printing business cards on large sheets of paper), the standard solution to alignment tolerance is the Bleed Margin.
Safe Area: Critical text and design elements are kept safely inside a boundary so they are never cut off, even if alignment drifts.
Why Bleed is Problematic for Flatbed UV: When printing on pre-cut rigid blanks like ceramic magnets, the design cannot simply be "bled" off the edge. If UV ink prints past the edge, it hits the side of the magnet or the alignment jig, where the UV lamp instantly cures it into a hard crust. This ruins the clean look of the product and eventually destroys the jig.
Some makers use a physical workaround for this: manually applying masking tape around the edges of every single blank to catch the bleed, then peeling it off after curing. While this works for a one-off project, it is incredibly tedious and unscalable for batch production.
💡 The Scalable Solution
Since manual masking is too slow for production, an inverted digital concept must be applied: an automated Safe Area. By creating a tiny unprinted buffer zone just inside the perimeter of the magnet, the accumulated mechanical tolerances are absorbed mathematically.
The Automated Fix in GammaCrop
Previously, creating this Safe Area was tedious print preparation work. You either had to pre-shrink your artwork precisely in Photoshop, or painstakingly calculate and adjust decimal offsets in EufyMake Studio manually for every single image.
To automate this, we added a Safety Margin slider to GammaCrop (our free pre-processing tool for printing magnets on the E1, which also handles exact-ratio rounded cropping and local AI background removal).

Testing the Values: 0.2mm vs 0.3mm
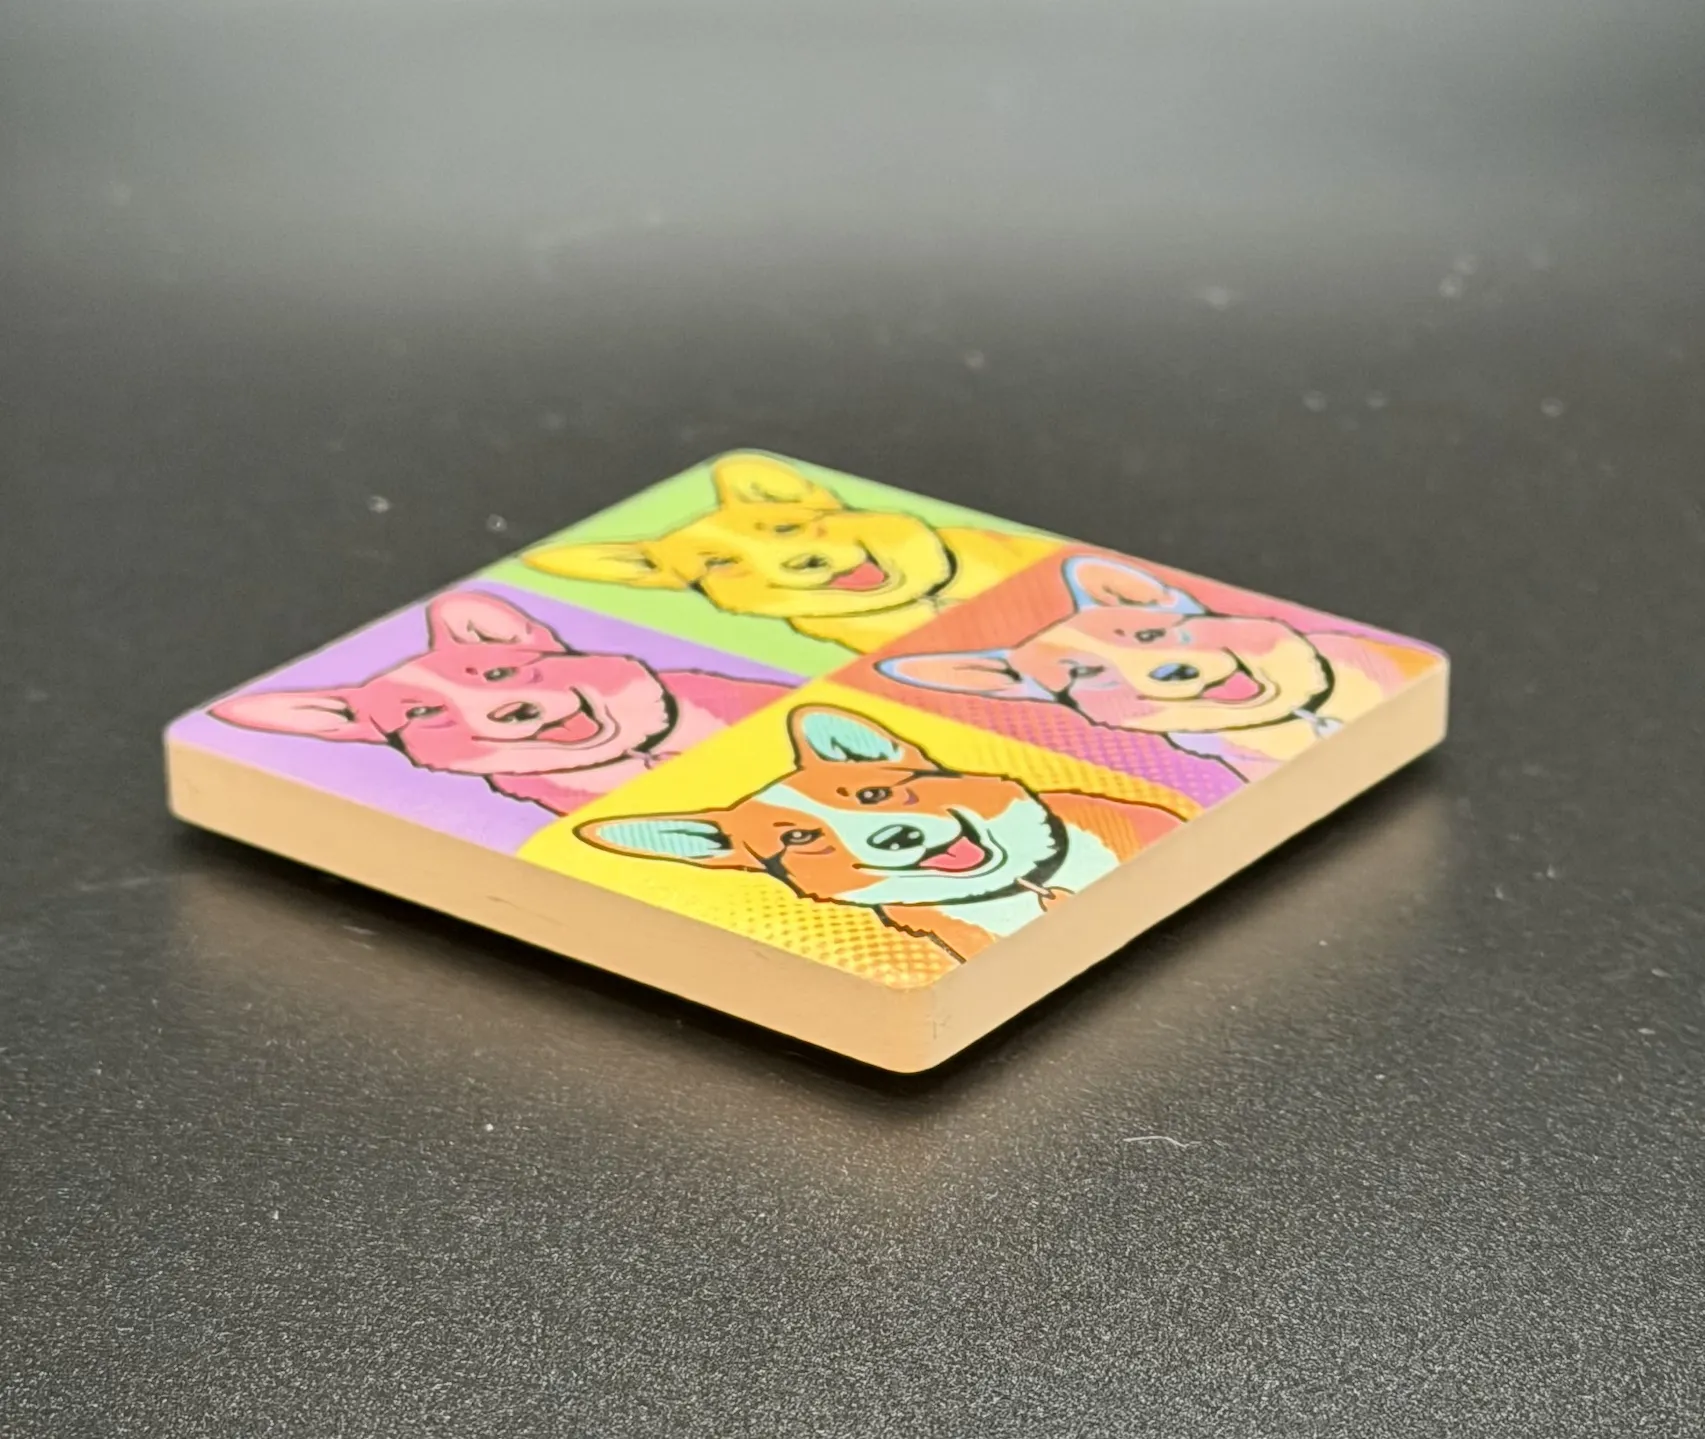
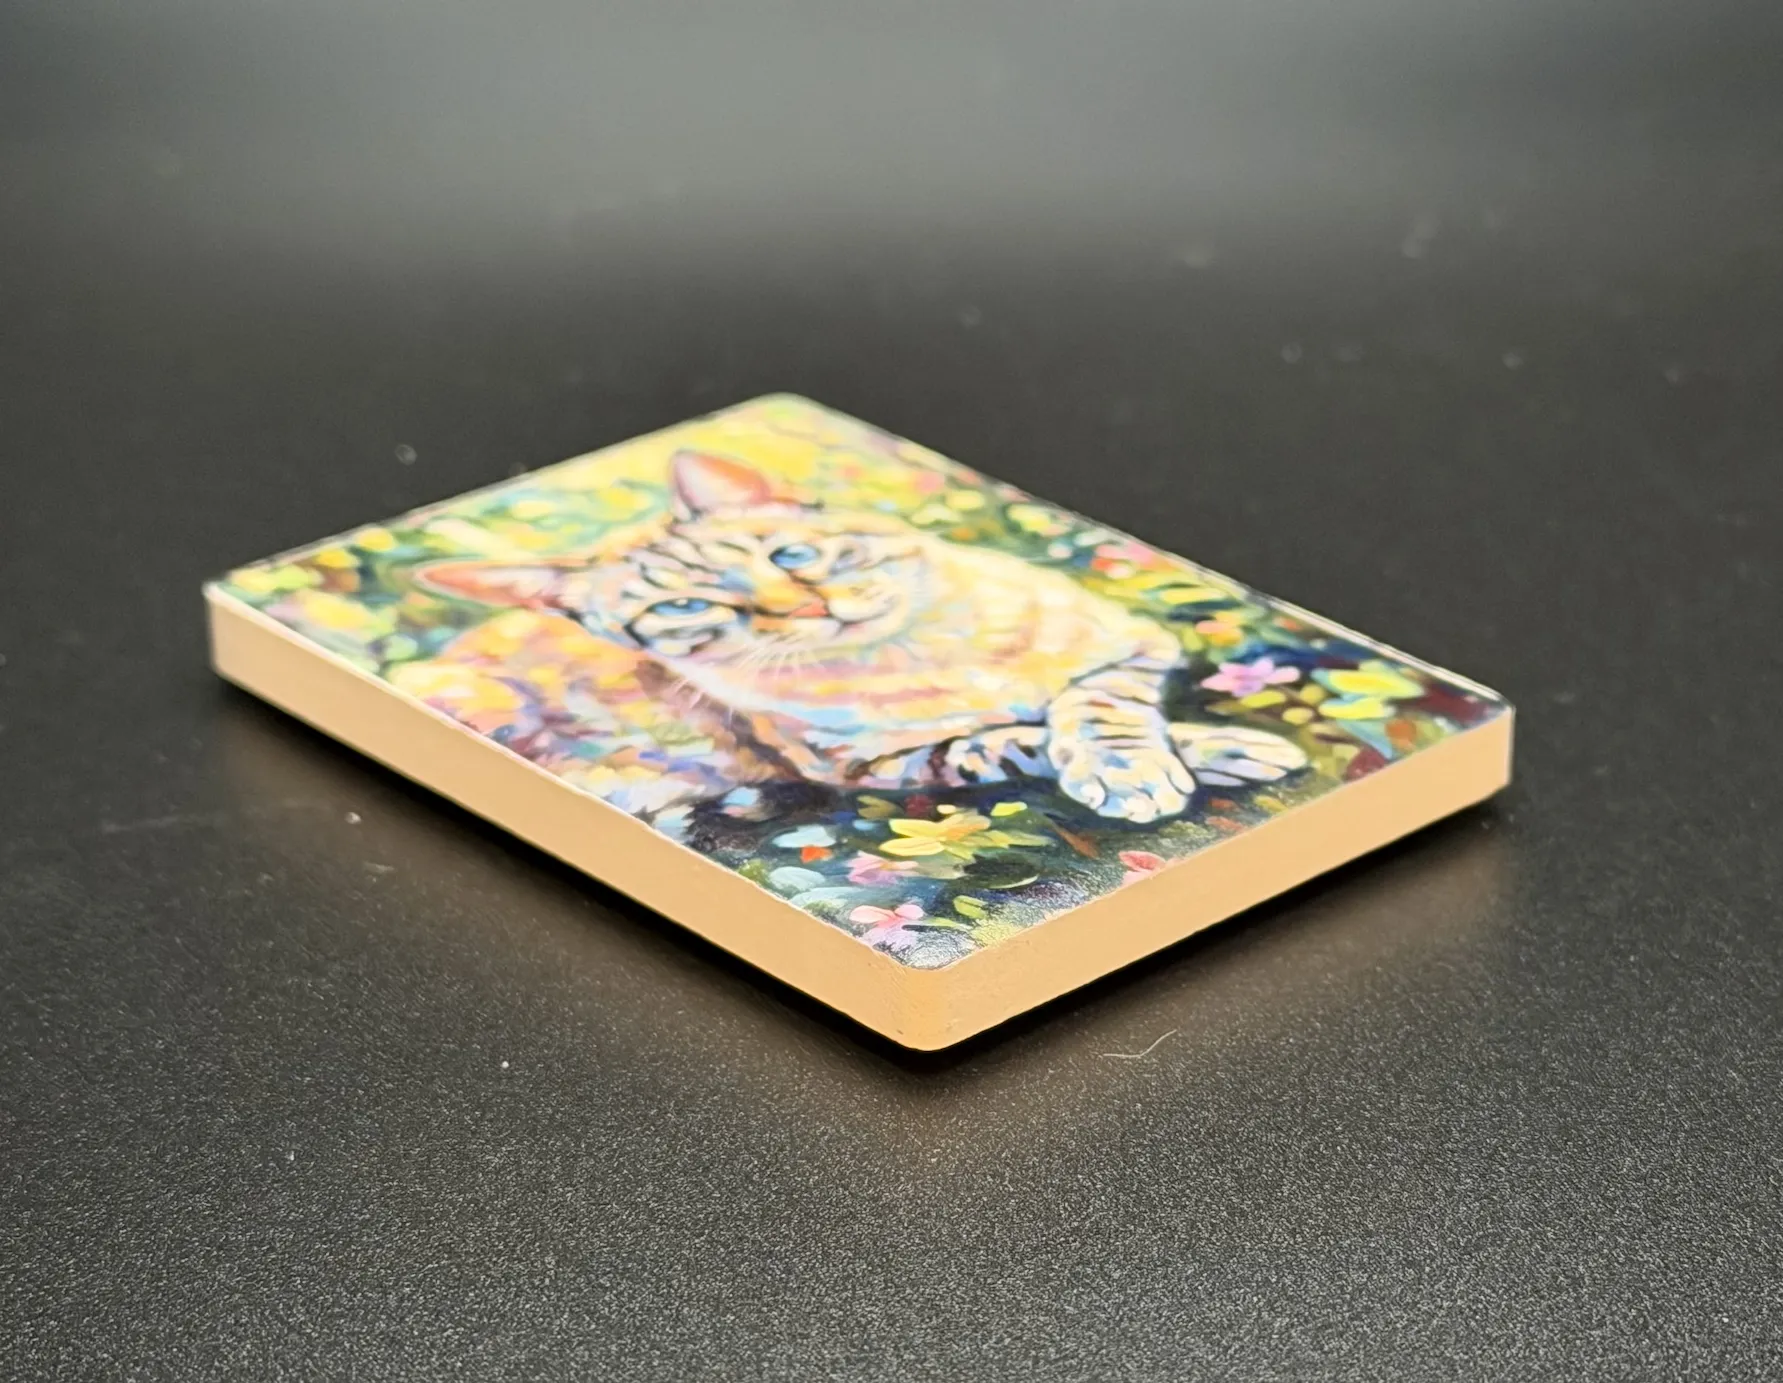
By creating this transparent buffer zone, the ink stays cleanly within the magnet surface even if the accumulated alignment is slightly off. Here is how different edge designs react to the Safety Margin:

A Quick Note on Placement Skew
While a 0.3mm Safety Margin reliably eliminates overspray, a wider margin makes physical placement more sensitive to rotation. If you do not seat the magnet perfectly perpendicular against the jig wall, the printed design will appear slightly skewed relative to the physical edges.
Ready to Print
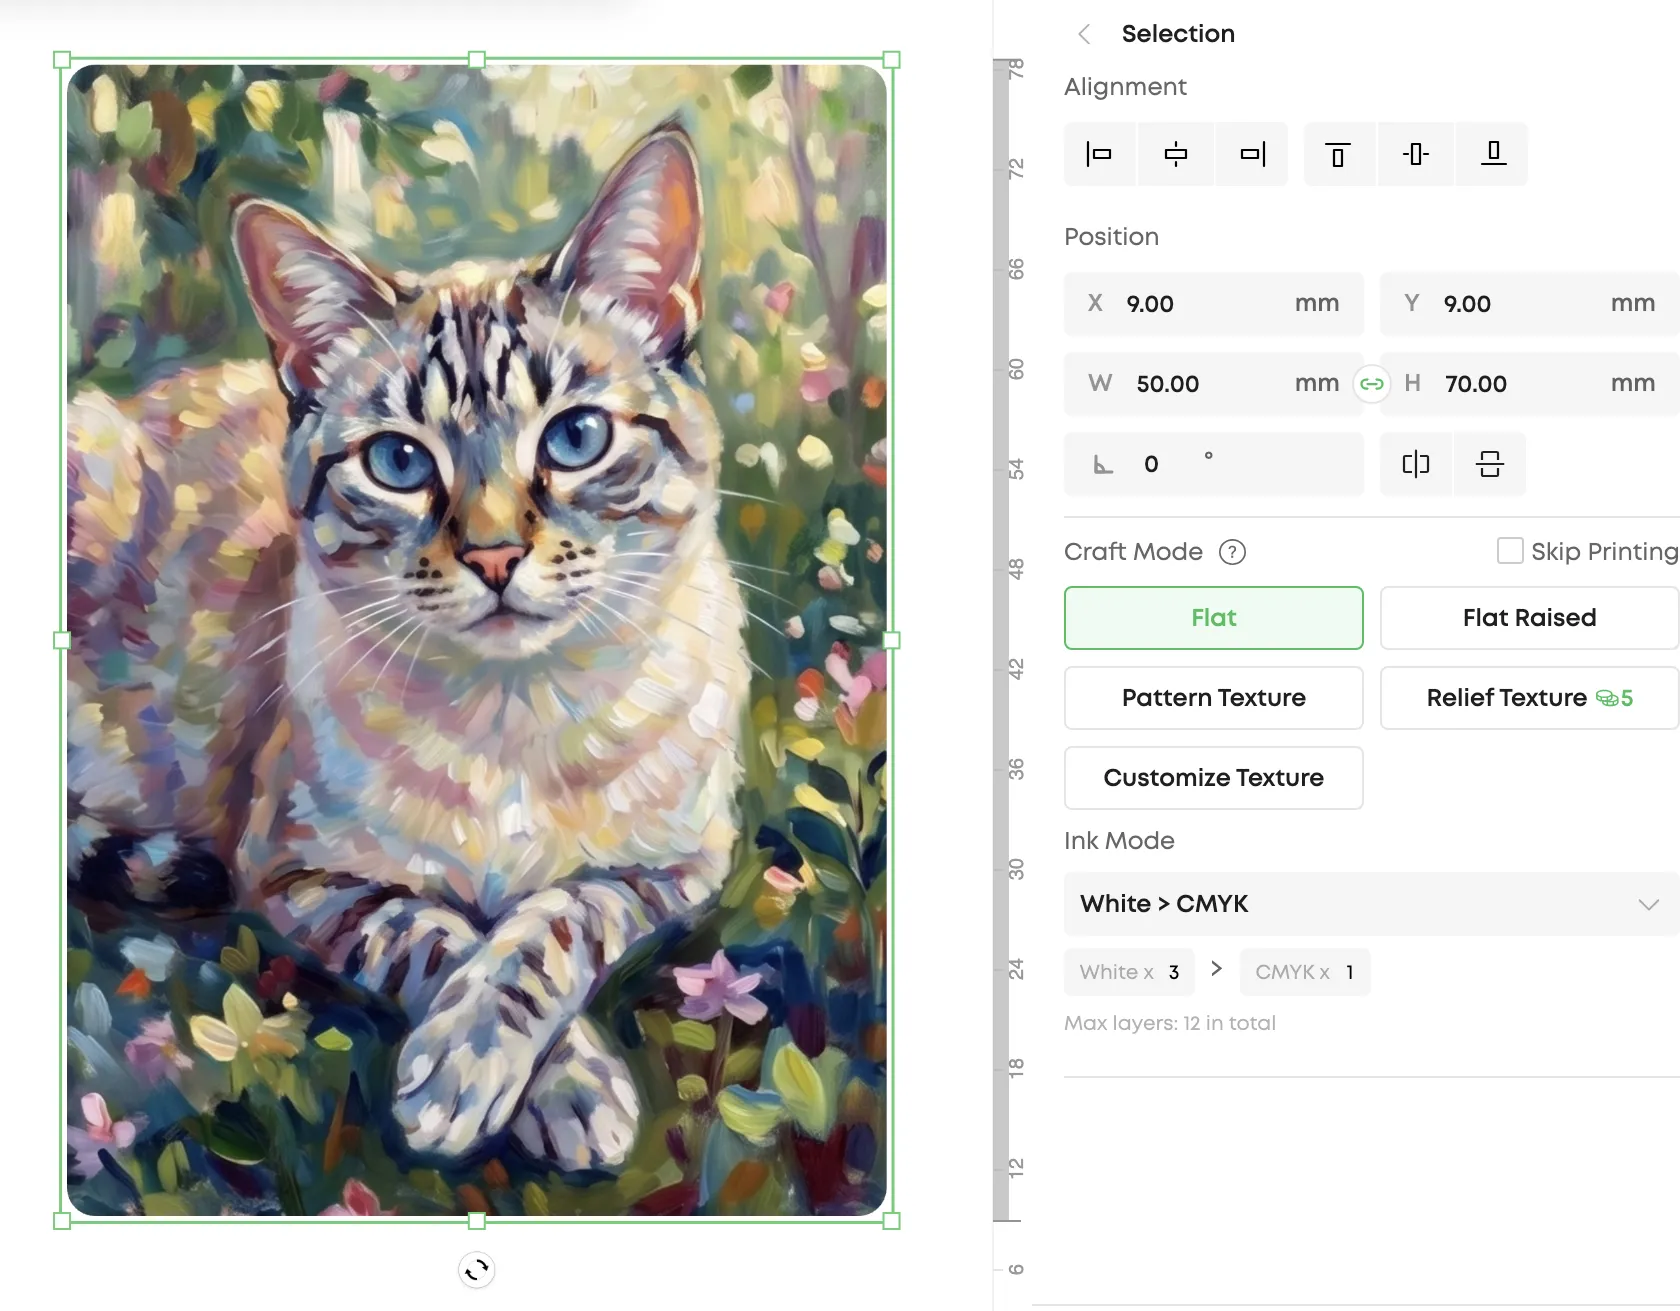
Once you export your pre-processed image from GammaCrop, it imports seamlessly into EufyMake Studio. The image remains at the exact required physical dimensions (e.g., 50×70mm), but the corners are perfectly rounded and the Safety Margin is already "baked in" as transparent pixels.
Join the Conversation
Have you experienced overspray when printing magnets? We're discussing tolerance stacking and sharing results in the r/eufyMakeOfficial subreddit thread.
GammaCrop remembers your margin setting locally in the browser, so you can set your preferred buffer once and never think about it again.